
Important
Your applicationId or package name must same with your package name that you've create on Firebase console when you generate google-services.json
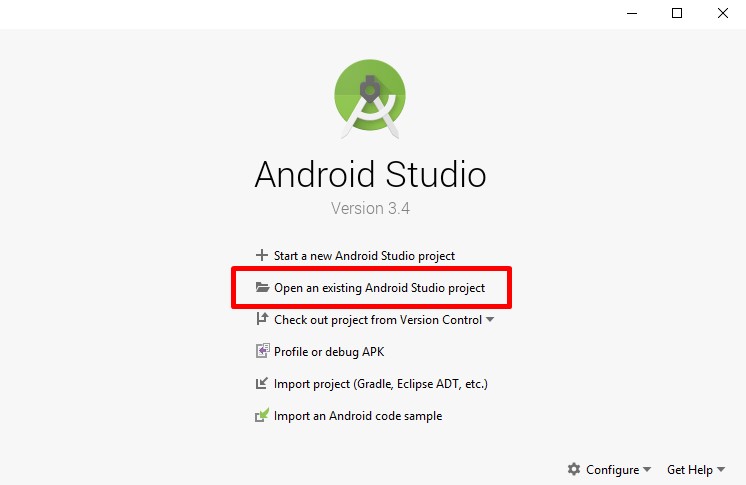
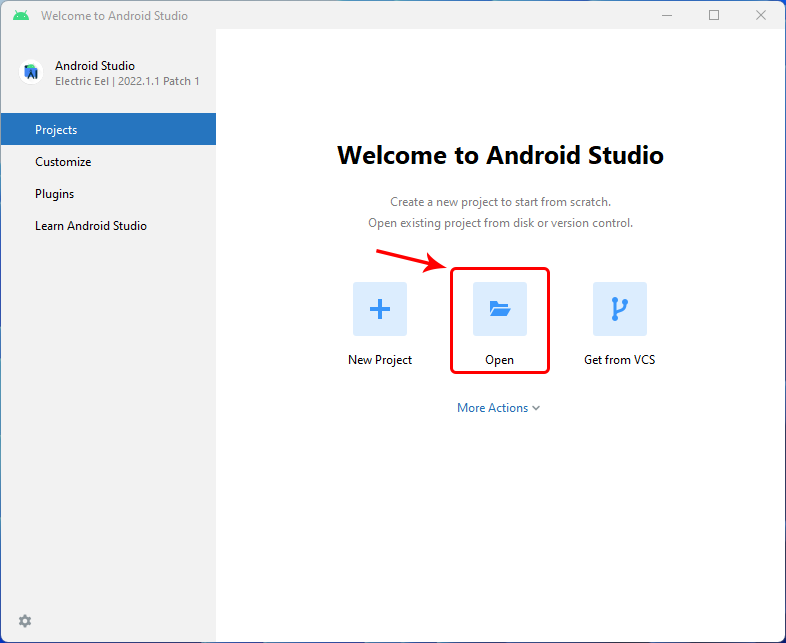
Extract .zip you download from Codecanyon, you will see some file and folder. The project location inside Android_Side folder. When your Android Studio ready you can open it and you will see display like this:
Before you do step change the package name, you must do this step for firebase project configuration. Please note: this step is mandatory to generate google-services.json file, "Server key" and "Sender ID".
How to generate google-services.json file? Click Here!
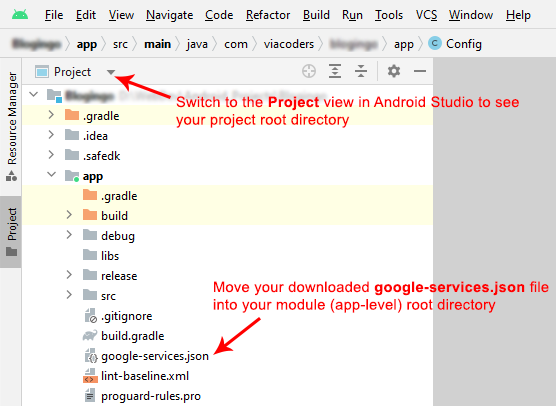
After you generate and download the google-services.json, please added it, in the directory app in the Android project.
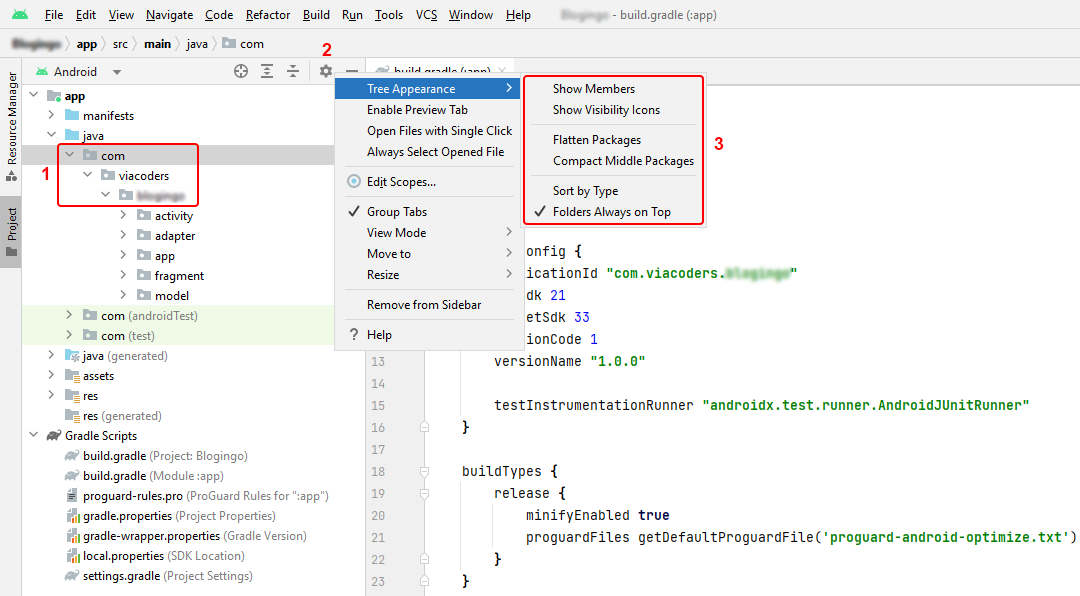
1. Switch to the Project view in Android Studio to see your project root directory.
2. Move (copy and replace) your downloaded google-services.json file into your module (app-level) root directory.
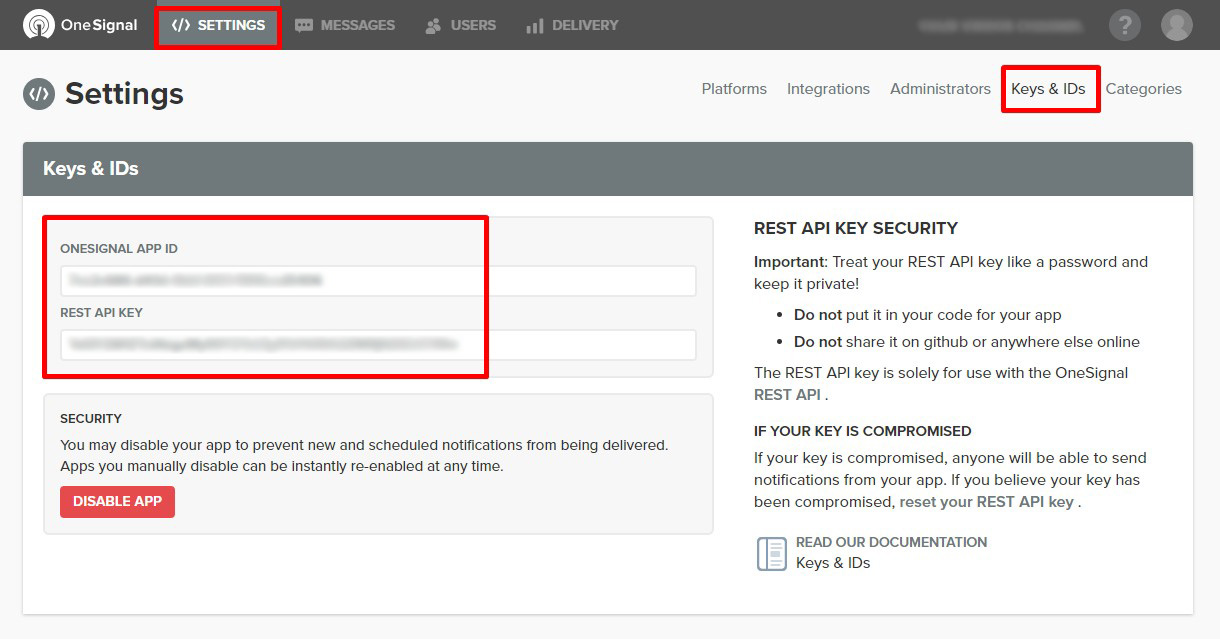
Note: Please write "Server key" and "Sender ID" from your Firebase console on a paper or text file. We need these keys for OneSignal configuration.
Required For Setup:
Config.java Setup:
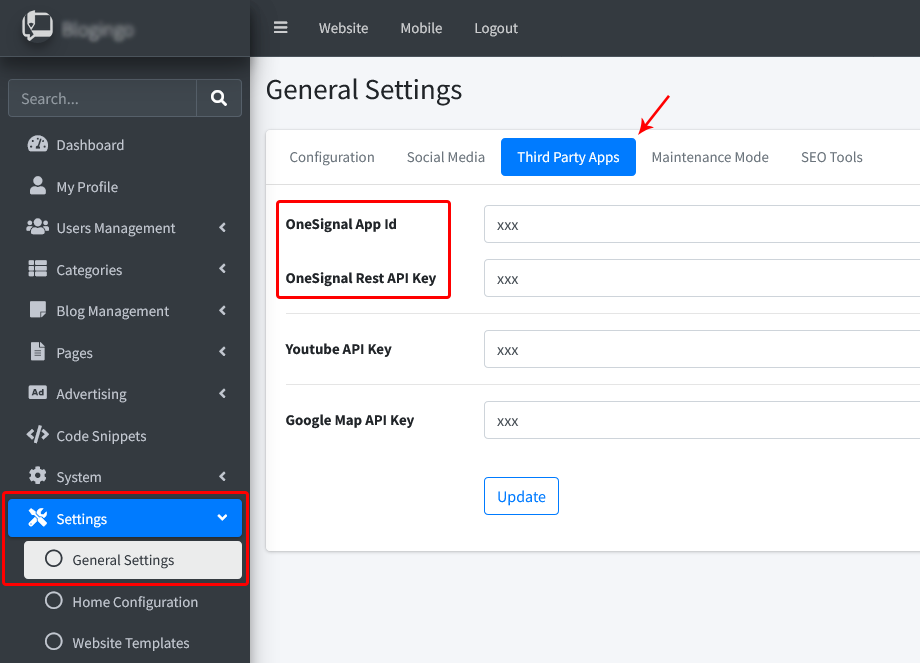
Update ONESIGNAL_APP_ID value from app > java > YourPackageName > app > Config.java with your OneSignal app id.
Keys & IDs Setup:
Your applicationId or package name must same with your package name that you've create on Firebase console when you generate google-services.json
When your server side already configured properly, you can connect it to your android app.
To change BASE_URL: please open app > java > YourPackageName > app > Config.java and change it to your admin dashboard installation URL.
public static final String API_ID = "xxx";public static final String API_KEY = "xxxxxxxxx";
Change Application Name and Text Inside the Application:
If you want to change default font, first prepare a TTF format font that you like and then:
To sign your app in release mode in Android Studio, follow these steps:
Change Your AdMob app_id and unit_id
Enable and Disable AdMob:
Open Admin Dashboard and go to: Advertising → AdMob Configuration
AdMob ads are not displayed on the phone?
If you were not able to see the ads after changing the application id and unit id to yours, make sure you entered AdMob API keys correctly from AndroidManifest.xml and Admin Dashboard. The ad request was successful, but no ad was returned due to lack of ad inventory. It’s because of your AdMob settings that there are no ads for your preferred language or location. Email to Google and ask about errorCode 3 to advise you to make changes to your AdMob settings.
Apps include resources that can be specific to a particular culture. For example, an app can include culture-specific strings that are translated to the language of the current locale. It's a good practice to keep culture-specific resources separated from the rest of your app. Android resolves language- and culture-specific resources based on the system locale setting. You can provide support for different locales by using the resources directory in your Android project.
Language configuration for Server Side:When you have translated strings.xml files, your project has multiple corresponding values folders with suffixes that indicate the language, such as values-es for Spanish. Your default strings.xml file is always in the values (no suffix) folder.
For more information and find how to add more languages file, Click Here!
Users following links on devices have one goal in mind: to get to the content they want to see. As a developer, you can set up Android App Links to take users to a link's specific content directly in your app, bypassing the app-selection dialog, also known as the disambiguation dialog. Because Android App Links leverage HTTP URLs and association with a website, users who don't have your app installed go directly to content on your website. So we suggest you to purchase both Android and Website version.
Deep links are URIs of any scheme that take users directly to a specific part of your app. First of all, you need Digital Asset Links. To generate and test Digital Asset Links follow the steps below:
● To open your android app via Deep Link, use: https://www.yourdomain.com/run , If the application is installed on the user's phone, it will be opened, otherwise it will be referred to the application download page.
● To share file via Deep Link, use: https://www.yourdomain.com/file?id=1 (instead of the 1, you should put the fileId). If the application is installed on the user's phone, it will be opened, otherwise it will be referred to the website. We suggest you to purchase both Android and Website version.
● To share blog post via Deep Link, use: https://www.yourdomain.com/post?id=1 (instead of the 1, you should put the postId). If the application is installed on the user's phone, it will be opened, otherwise it will be referred to the website. We suggest you to purchase both Android and Website version.
If there are any problems, please visit our FAQ page. Click Here!
